Here is another example of how I’ve used computer techniques to help with the production of artwork that not only appears to be “conventional” (i.e., drawn or painted directly on paper), but is in fact largely produced using conventional methods.
Several years ago, I produced a short series of comic strip cartoons titled “Moggies” (“moggie” being a British slang term for a non-pedigree cat). I wanted to produce the strips using the standard “brush and ink” technique, but I didn’t want to spend a lot of time trying to ink in the balloon text, and felt that that task would be more efficiently handled using computer desktop publishing techniques.
Of course, it is possible to create comic strips entirely using computer techniques, and I’m not suggesting that conventional techniques are somehow better. Nonetheless, in this instance I wanted the published strip to look informal and light-hearted, and I felt that a more “freehand” approach would help to provide those qualities.
The Final Result
Let’s look at one of the final cartoons, before discussing how it was produced. This was exhibited in an Art Show, where it won a “Best of Show” prize. As you can see, the style looks like a fairly standard comic strip; consisting of colored-in areas over a black outline. There’s nothing remotely avant garde about the design of the strip; it has four rectangular panels, the aim being to make it easy to follow. This was a humorous cartoon, so I wanted the artistic style to be “casual” and light, rather than precise and technically accurate.
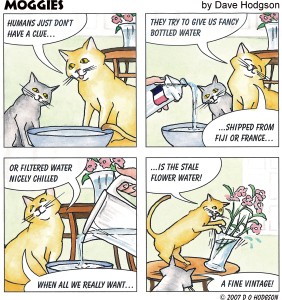
Since I’d be “telling a story” here, the first step of course was to specify the details of the story, and decide how it would be plotted. I’d decided that my strip would have four panels, and I’d use the panels to develop a “gag”. The punch line for the gag would obviously need to be in the fourth panel, with the scenes in the previous three panels providing the lead-up to that.
Comic strips usually adhere to implicit conventions that you need to follow, if you want your readers to be able to follow the strip easily. For example, in English-language countries, we read the strip from top to bottom, and from left to right. It’s important that the conversation “bubbles” in the strip frames should also flow from left to right, so that readers will tend to read each one in the order that is natural for them. Thus, the positions of the cats in each frame of the strip had to be such that it would be possible to place the bubbles in the most readable order.
Firstly then, I wrote out the script for the bubbles in the four frames, without pictures, to ensure that the gag would be understandable. This also established how many bubbles there would need to be.
Next, I printed the outlines of the four frames on a sheet of paper (just so I’d be able to erase portions of the drawing without having to redraw the frames). Within the frame outlines, I sketched in the cats in pencil, together with rough ellipses for the positions of the bubbles, as below.
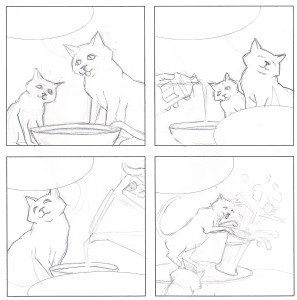
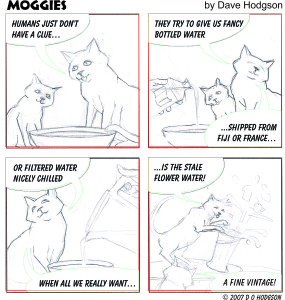
I then scanned my pencil drawing, and imported the scanned bitmap into Corel Draw. I added the bubbles as vector ellipses in Corel Draw (and then trimmed the ellipses with the frame borders, as I described for the gear icon in a previous post). I inserted the text into the bubbles, using an appropriately-named font called “Balloon”, and adjusted everything so that the text fitted neatly into the bubbles. In the working image below, the red and green outlines show the elements that were generated by Corel Draw, over the top of the scanned pencil bitmap.
When I’d arranged everything as I wanted, I inked in the original pencil sketch of the cats, as below. Then, I rescanned the inked drawing as below, and imported that into the same Corel Draw file, replacing the previous scanned pencil image.
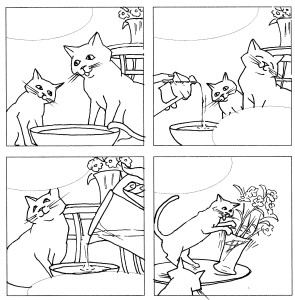
At this point, you may be wondering, “But what about the colors?” Having combined the inked drawing with the computer-generated outlines and text in Corel Draw, I printed out the result on a laser printer. This provided a complete, waterproof outline drawing with text, over which I could paint using watercolors. Of course, I could have colored in the monochrome outline in the Corel Draw image, but I felt that hand-coloring would convey the “casual” style that I wanted.
This post more or less completes my series on computer-assisted artwork production. I do plan to add one more short “postscript” post, describing an very early item of comic strip artwork that I produced in my “pre-computer” days!


